

Photoshop Save Slices As Separate Images
If you have exported or saved several images in Photoshop that are in the same artboard you know that it's tedious to save each image separately. You have to Save As and then name your file, then choose the folder you want to save the image into. Well, that's ok but what if you had more than a few images and you had to save each one separately? There is a trick to do that. I'll show you how below.
The Slicing Tool
If you are new to exporting assets for the web or exporting several images from an artboard in Photoshop this tutorial should help you achieve just that. Here are the steps on how to export assets from Photoshop. I'll assume you already have a design or layout with several images that you want to export but don't want to export them one by one.
Step 1: Using the Slice Tool
 Start by selecting the Slicing Tool in located in your Tools Panel. The Slice Tool is one of the most popular and useful tools for exporting website assets all at once. There are Slice Layers as well, but for this quick tutorial we'll just focus on the assets export.
STEP 2: Slicing Your Artwork
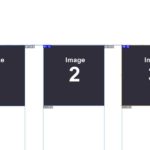 After selecting the Slicing Tool, you will then have to slice the images or areas you would like to export and save. To do this just click and drag the area that you would like to turn into a slice. Slices make it easy to select areas within your artboard whether your selected are has several layers. It makes it easy to just select an area and save that area made into a slice.
STEP 3: Naming Your Slices
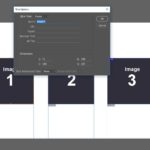 Now that you have sliced your artwork it's time to name your slices by double clicking on each slice and naming your slices. The slice name on this dialog box will be the name of your image file.
STEP 4: Saving Your Slices
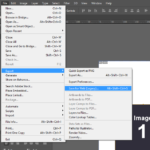 After naming your slices you will then Save for Web by selecting File > Export > Save for Web (Legacy) (CC 2015.5.1). Then the Save As window will come up.
STEP 5: Exporting Your Slices
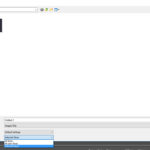
This next and final step is very important when saving for web and exporting your files correctly. 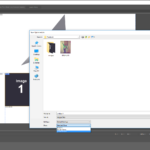 You are going to select your slices using the Slice Select Tool and then selecting the PNG image option, or whatever file format you would like to save it as. Then, you will select the option at the bottom where it says Slices and select the Selected Slices from the drop down menu.
 The dialog box will then ask where you would like to save your assets. The Save for Web assets will ALWAYS save in a folder called "Images". If you haven't already created one already, the system will automatically create one for you. If you have already created a folder named images, then the assets will be saved inside that folder. Remember to click and save outside the images folder if you have created one already. Photoshop will automatically go into your images folder and save them there, but you'll have to be outside of your images folder and NOT inside the folder when saving your image assets.
Video Tutorial
I created a video that might help you better understand how to export assets in Photoshop. Sometimes videos help me learn something a little better than reading a tutorial. Hope this video helps you achieve your goal.
Submit a comment!
Photoshop Save Slices As Separate Images
Source: https://www.giovannicreative.com/how-to-slice-and-export-images-in-photoshop/
Posted by: flynncrue1941.blogspot.com
0 Response to "Photoshop Save Slices As Separate Images"
Post a Comment